
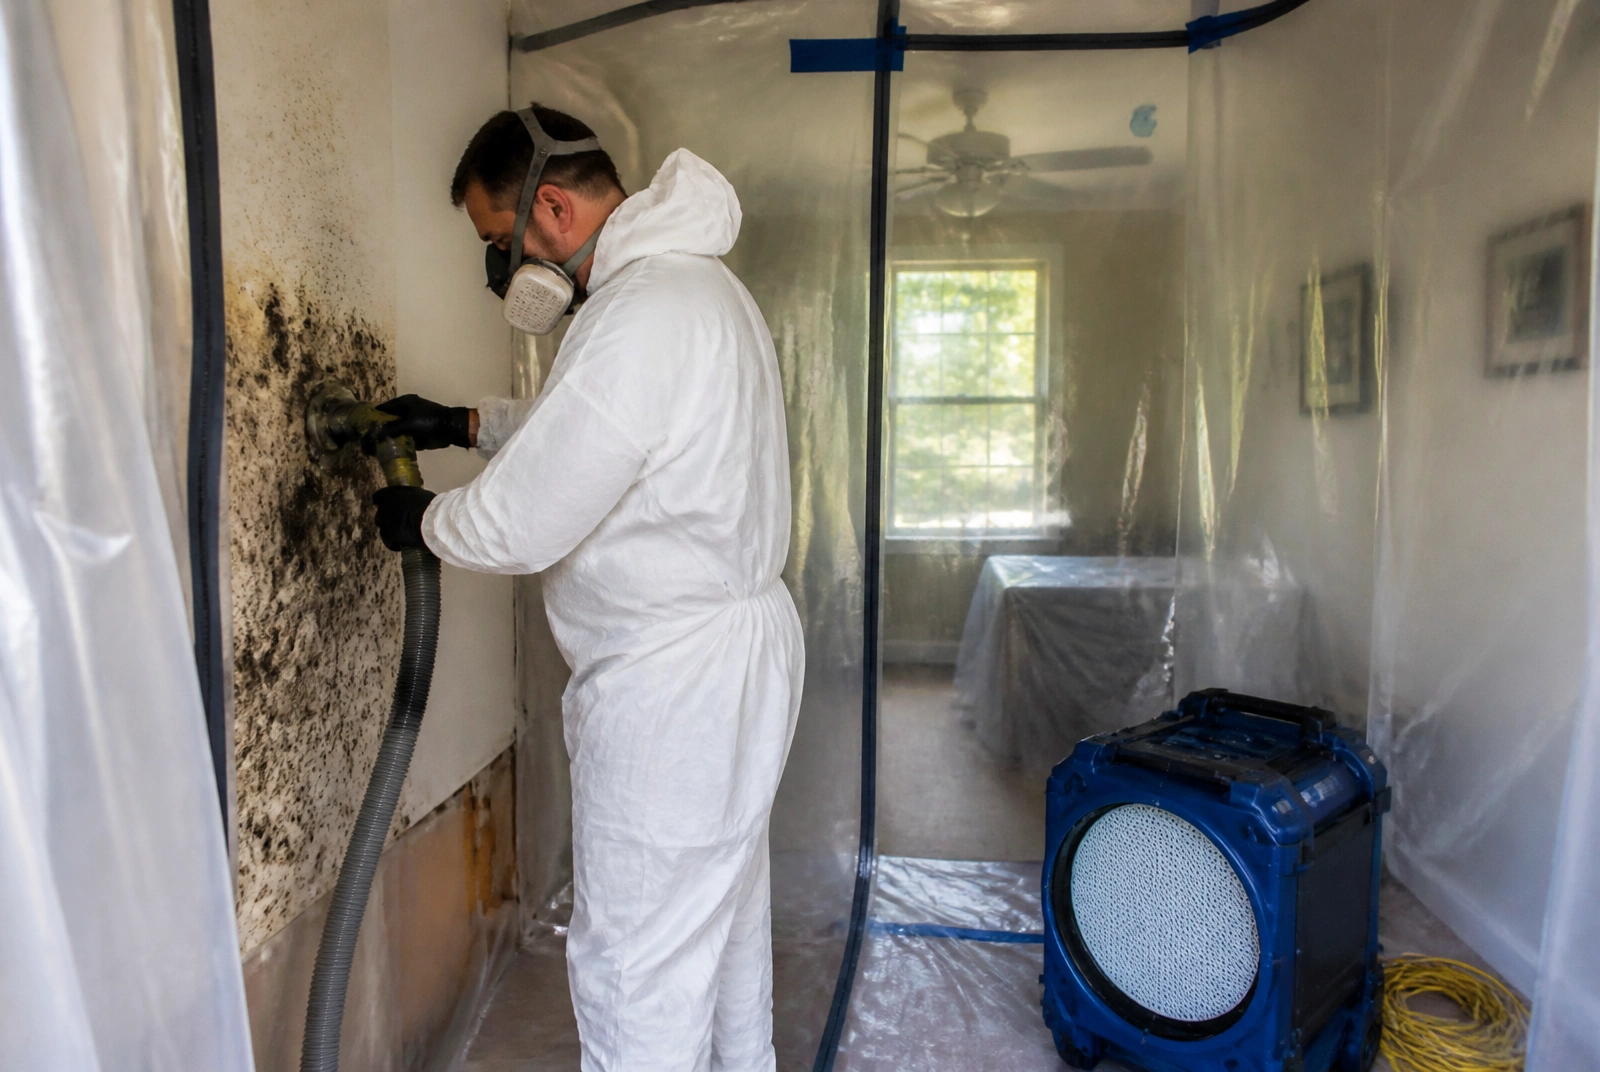
The most common mistake in mold cleanup is not using the wrong product — it is disturbing growth without containment. Scrubbing a moldy wall aerosolizes spores that were previously sitting still, and the HVAC system distributes them everywhere else. A small problem becomes a whole-house problem in an afternoon.
This guide covers how to clean mold safely when the job is genuinely small, and what changes when it is not.
First: is this a DIY job?
Work through this honestly before touching anything.
You can likely handle it yourself when all of these are true:
- The affected area is under roughly 10 square feet — about a 3-by-3-foot patch
- The growth is on a hard, non-porous surface: tile, grout, glass, finished metal, sealed countertop, or a solid plastic tub surround
- You know exactly what caused the moisture and it has been corrected
- Nobody in the household has asthma, a mold allergy, or a compromised immune system
- There is no musty odor anywhere else in the home
Call a professional when any of these are true:
- Growth on drywall, insulation, carpet, carpet pad, ceiling tile, or wood framing
- More than about 10 square feet, or growth in multiple rooms
- Musty odor with no visible source
- Growth following a flood, sewage backup, or a roof leak that ran for weeks
- Mold in or around HVAC ducts, the air handler, or return plenum
- Growth that has come back after a previous cleaning
- Anyone in the household is medically vulnerable
If you are on the fence, treat it as a professional job. The cost of an unnecessary inspection is far lower than the cost of spreading contamination through the ductwork.
The safe DIY method for small, hard-surface mold
Protective equipment — not optional:
- N95 respirator or better (a surgical mask does not filter spores)
- Nitrile or rubber gloves that extend past the wrist
- Non-vented safety goggles
- Long sleeves and long pants you can wash immediately or discard
Steps:
- Stop the moisture first. Fix the leak, repair the seal, or correct the ventilation. Cleaning before this is wasted effort.
- Isolate the room. Close doors. Turn off the HVAC system so the air handler is not pulling spores into the ductwork. Do not run a box fan pointed at the growth — that scatters it.
- Ventilate to the outside. Open a window in the work area if weather allows.
- Clean with detergent and water. Scrub the surface with a stiff brush and a detergent solution. Physical removal is what does the work.
- Dry the surface completely. Wipe down, then run a dehumidifier or fan in the room afterward until the area is fully dry. Residual dampness restarts the cycle.
- Bag and remove waste. Put rags, brushes, and disposable materials in a sealed plastic bag and take it outside immediately.
- Wash up. Launder clothing separately in hot water and shower afterward.
What not to do:
- Do not mix bleach with ammonia or other cleaners — this produces toxic gas
- Do not paint or caulk over mold; it will grow through
- Do not dry-brush or sand growth, which sends the highest volume of spores airborne
- Do not use a standard shop vacuum without HEPA filtration; it exhausts spores back into the room
Does bleach actually work?
Partially, and less than most people assume. On non-porous surfaces, bleach removes the dark staining and kills surface growth. On porous materials — drywall, wood, grout with cracks — the chlorine stays at the surface while the water content soaks in, which can support the growth underneath.
For building materials, detergent plus physical scrubbing outperforms bleach, and for anything porous with growth through it, removal of the material is the only reliable answer. Neither the EPA nor most restoration standards recommend bleach as the default mold treatment on building materials.
What professional removal adds
The difference is not a stronger chemical. It is process control:
- Containment. Sheeted barriers around the work area with sealed entry.
- Negative air pressure. Air is exhausted from the containment so any airborne spores move away from clean space rather than toward it.
- HEPA filtration. Air scrubbers run continuously during and after the work.
- Selective demolition. Affected porous materials are removed and bagged inside containment rather than cleaned in place.
- Moisture mapping. Meters and thermal imaging confirm how far water traveled, so nothing wet is left inside a wall.
- Documented drying. Materials are dried to a verified target, not to the point where they merely feel dry.
- Post-remediation verification. Readings and photographs record the finished condition.
Our mold remediation service page walks through how we scope and stage this work, and the water damage restoration page covers the drying side when mold followed a water loss.
After removal: keeping it gone
Removal without moisture control is temporary. Hold indoor relative humidity between 30 and 50 percent, run bathroom exhaust fans during and after showers, maintain a crawl space vapor barrier, clear HVAC condensate drains as part of routine service, and respond to any new water intrusion within 24 to 48 hours.
If you are looking at growth right now and are not sure which category it falls into, call us and describe what you are seeing. We would rather tell you it is a manageable DIY cleanup than have you scrub a moldy wall and spread it through the house.
Frequently Asked Questions
Related Services
Containment, removal, and treatment of mold-affected materials in coastal Mississippi properties.
Targeted drying of framing, drywall, flooring, and structural cavities with daily moisture monitoring.
Commercial dehumidification sized to the water loss and monitored throughout drying.